Step 5 – Review & Submit
Step 5 shows a summary of everything the client has selected before you finalise the session.
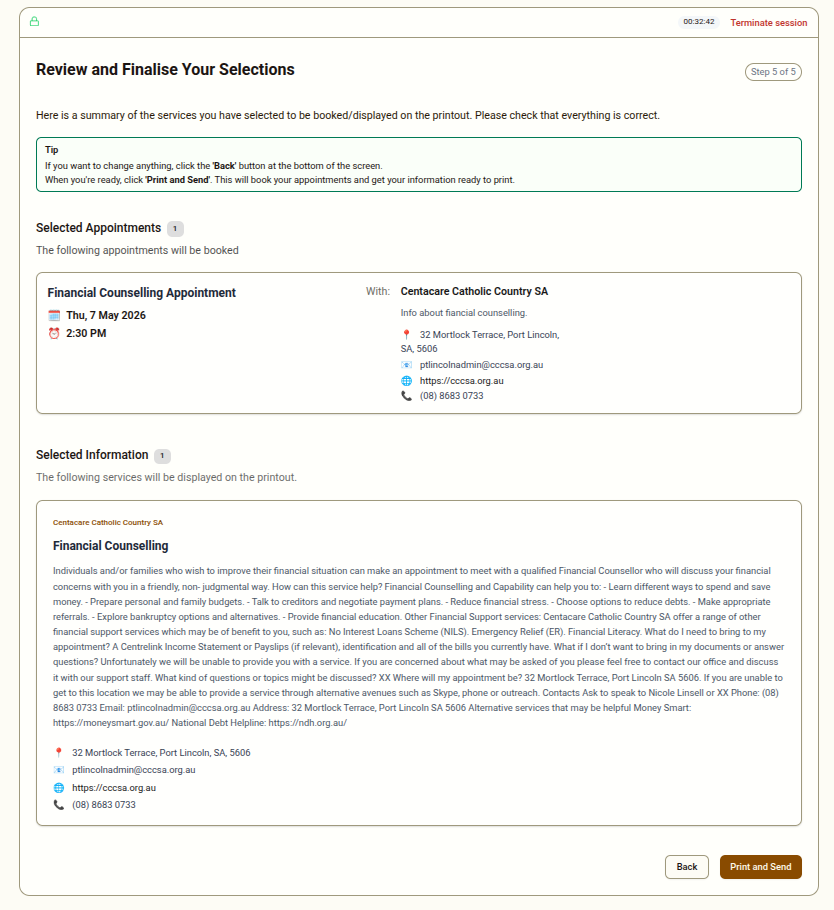
What You Will See
Section titled “What You Will See”The review screen is divided into two sections:
Selected Appointments A list of all appointment slots the client has booked, with the service name, provider, and date/time of each slot. A badge shows the total count.
Selected Information A list of all information listings the client has chosen to include in their printout, with the service name and provider. A badge shows the total count.
Before Submitting
Section titled “Before Submitting”Go through the summary with the client to confirm:
- All the appointments shown are ones the client wants and can attend
- All the contact information listings are relevant to their needs
- There are no slots selected that the client cannot make
If anything needs to be changed, use the Back button to return to Step 4 and adjust selections.
Submitting
Section titled “Submitting”When you and the client are satisfied with the selections, click Print and Send.
Clicking this button will:
- Send a booking confirmation email to each provider with an appointment slot selected
- Log the completed session in the system with all demographic data and selections
- Move to the print page where the printout can be generated
If There Are No Selections
Section titled “If There Are No Selections”If the client did not select any listings or appointment slots, the review screen will show empty sections. You can still submit, but consider whether the session has been useful. If the client did not find any relevant services, it may be worth trying different category selections or noting the gap for your administrator.